Introduction
Available for Windows, Mac OS X, and various Linux distributions, the Desktop Sync client enables you to:
- Specify one or more directories on your computer that you want to synchronize to the Cloud-Sync server.
- Always have the latest files synchronized, wherever they are located.
Your files are always automatically synchronized between your Cloud-Sync server and local PC.
Installing the Desktop Synchronization Client
You can download the latest version of the ownCloud Desktop Synchronization Client from your customer area. There are clients for Linux, macOS, and Microsoft Windows.
Installation on Mac OS X and Windows is the same as for any software application: download the program and then double-click it to launch the installation, and then follow the installation wizard. After it is installed and configured the sync client will automatically keep itself updated.
Linux users must follow the instructions on the download page to add the appropriate repository for their Linux distribution, install the signing key, and then use their package managers to install the desktop sync client. Linux users will also update their sync clients via package manager, and the client will display a notification when an update is available.
Linux users must also have a password manager enabled, such as GNOME Keyring or KWallet, so that the sync client can login automatically.
System Requirements
- Windows 7+
- Mac OS X 10.7+ (64-bit only)
- CentOS 6 & 7 (64-bit only)
- Debian 8.0 & 9.0
- Fedora 25 & 26 & 27
- Ubuntu 16.04 & 17.04 & 17.10
- openSUSE Leap 42.2 & 42.3
Installation Wizard
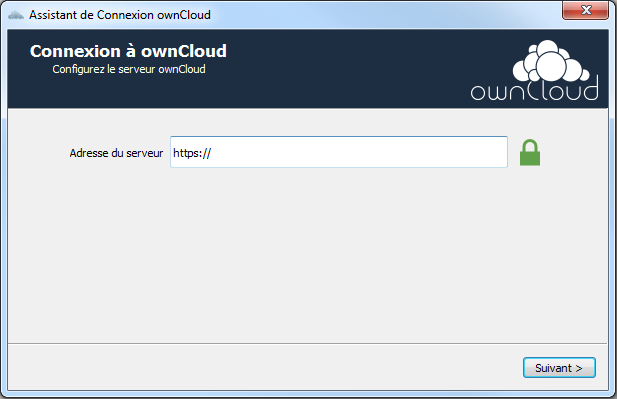
The installation wizard takes you step-by-step through configuration options and account setup. First you need to enter the URL of your Cloud-Sync server indicated on your customer area.
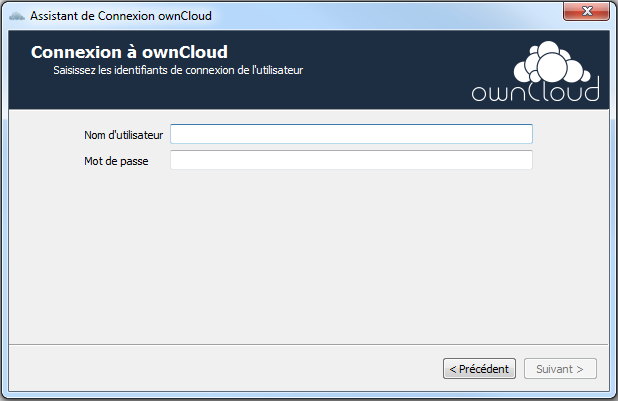
Enter login from a user created in the customer area on the next screen.
On the “Local Folder Option” screen you may sync all of your files on the server, or select individual folders. The default local sync folder is ownCloud, in your home directory. You may change this as well.
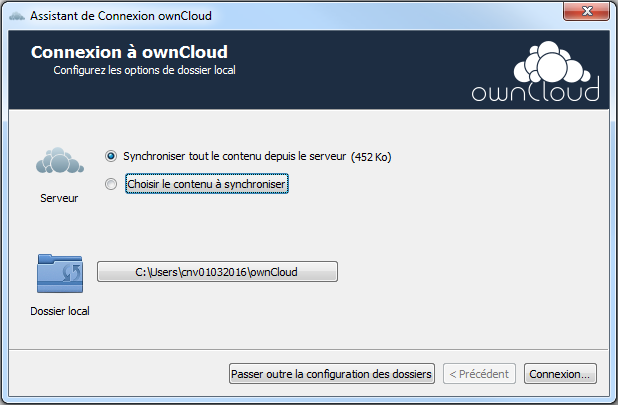
When you have completed selecting your sync folders, click the “Connect” button at the bottom right. The client will attempt to connect to your ownCloud server, and when it is successful you’ll see two buttons:
- one to connect to your Cloud-Sync Web GUI
- one to open your local folder
It will also start synchronizing your files.
Once the application is correctly configured, if you have already added files to your online space (via the web interface or if you have already configured the application on another computer), the files already stored will be automatically copied to the local folder on your computer.
This synchronization is done in an automated and transparent way. Any documents you added to your local synced folder will automatically be uploaded to your online space. And any document loaded via the web interface will be copied to your local folder.
You can synchronize a folder with several machines at the same time, for example to have a copy of all your important documents on all your devices without the need to juggle USB keys, especially when you are often on the move.
If you are working on your files without an Internet connection, as soon as you are connected again, the application will synchronize the local changes with the server and if files have been modified on other synchronized devices, they will be applied to yours.